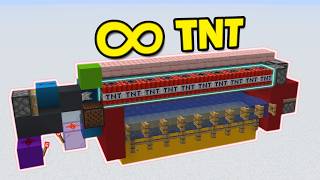
Video: How to build an Orbital Strike Cannon by NovelNosh
How to build it
- Install Litematica and schematics
Download and install the Litematica mod along with the four Orbital Strike Cannon files: the MK1 Cannon, Nether chunk loader, Control Panel schematics, and the OSC Fire Control spreadsheet. Place the three schematic files into your Minecraft schematics folder and open the Fire Control file in a spreadsheet editor.
- Align the cannon to chunk borders
In your world, press F3 + G to view chunk borders and find an origin coordinate divisible by 16 (such as X: 160, Z: 224) and set the Y-level to 122. Enter these origin coordinates into the Fire Control spreadsheet, load the cannon schematic in Litematica, and ensure the main Nether portal sits centered across the four intersecting chunk borders.
- Build the base layers and load music discs
Render the schematic layer by layer starting from the bottom (around Y=107) and place the blocks. Put two shears into the initial pair of hoppers, then fill the designated chests, dispensers, and hoppers with specific music discs in order (13, cat, blocks, far, mall, mellohi, and stal) and place the Chest Minecarts as shown in the schematic.
- Configure mid-layer droppers and barrels
Continue building upward layer by layer while filling the internal containers. Put 19 redstone dust into the specified dropper, fill the two calibration barrels with the required number of shears, place the Hopper Minecart onto its spot, and put 2 redstone dust into each of the row droppers.
- Load the wireless redstone and encoding droppers
On the upper logic layers, place a full stack (64) of redstone dust into each of the top-row droppers and 1 redstone dust into each of the hoppers and divided droppers across the line. Double-check every container as you go, because a single missing item will break the coordinate encoding.
- Set up water streams and chunk loader dispensers
Place the white concrete blocks, buttons, and water sources on both sides of the machine, leaving the Nether portals unlit for now. Align a hopper minecart inside the honey block water stream using a temporary rail so it can pick up boats, then fill the back chunk-loader dispensers (not the hoppers) completely with boats.
- Fill top-layer signal barrels and redstone counters
Near the chunk loader and control logic, place redstone dust into the top droppers as well as the specific stacks of 64, 18, and 8 redstone dust in the designated timing droppers. On the roof layers of the cannon, fill the array of barrels with the exact patterns of shears shown (some full, some leaving 1 or 3 empty slots) to set the comparator signal strengths.
- Build and link the Nether chunk loaders
Check your Fire Control spreadsheet for the calculated Nether coordinates (origin X and Z divided by 8) and travel to the Nether roof at that exact position. Load the Nether schematic, build the portal receiver assembly, light the portals, and press the activation button to start the boat chunk loader.
- Verify the schematic and load TNT
Return to the Overworld and run Litematica's Schematic Verifier on the cannon to spot any missing or misconfigured blocks. Once verified and once all water sources are safely in place, fill the cannon's duplicator/dispenser arrays with TNT and flick the master lever so the cannon stays armed when you leave the chunks.
- Build the remote control panel
Travel to wherever you want your launch room to be, turn on chunk borders (F3 + G), and align the green markers of the Control Panel schematic with the chunk borders. Build the panel layer by layer, inserting the required shears into the barrels, placing 9 redstone dust in the counter dropper, and loading the chunk-loader dispenser with boats.
- Input launch codes and fire the cannon
Enter your target coordinates and nuke size (between 16 and 31) into the Fire Control spreadsheet, then copy the generated binary code onto the control panel levers. Pull the suspension lever, press the transmit button, cast a fishing rod onto the trigger once the indicator light stops flashing, and step through your auxiliary Nether portal when the bell dings to watch the strike.
How it works
The Orbital Strike Cannon operates by combining four advanced technical Minecraft systems:
- Wireless Redstone & Item Encoding: The remote control panel encodes your target X/Z coordinates and payload size into binary pulses calculated by the external spreadsheet. Specific item counts inside droppers (1, 2, 8, 18, 19, and 64 redstone dust) and non-stackable music discs allow the system to count and transmit exact timings across dimensions.
- Comparator Signal Calibration: Dozens of barrels across the cannon are pre-filled with exact quantities of non-stackable
shears(leaving 1 or 3 slots empty, or partially filled). Comparators read these barrels to provide constant reference signal strengths for the cannon's internal timing and alignment circuits. - Boat Portal Chunk Loaders: Dispensers stocked with boats periodically fire entities through the chunk-aligned Nether portals into honey block water streams with hopper minecarts, keeping both the remote cannon and its Nether counterpart entity-processing loaded while you are thousands of blocks away.
- Payload Delivery: Once the wireless receiver decodes the launch code and primes the cannon, the main TNT array fires a massive compressed propellant charge alongside the payload charge, flinging thousands of TNT entities across the world to rain down on the target coordinates.
Tips & variations
- Chunk alignment is mandatory: Always press
F3 + Gbefore placing the cannon or the control panel. The cannon's central Nether portal must sit at the intersection of four chunks, and its origin coordinates must be divisible by 16. - Use Litematica's Schematic Verifier: Because this build contains hundreds of droppers, hoppers, and barrels with exact item counts, always run the Schematic Verifier before arming the TNT. One misplaced redstone dust or missing shear will cause the cannon to misfire or blow itself up.
- Place water before TNT: Never place the TNT blocks while using Litematica Easy Place mode until the entire build is verified and all waterlogged blocks and water streams are in place.
- Java Edition only: This machine relies heavily on Java Edition chunk loading mechanics, entity physics, update order, and wireless redstone behavior; it will not work on Bedrock Edition.