Video: Expandable Minecart Station!!! (Easy & Simple) [Minecraft Bedrock & Java 1.21] #redstonebuilds by BrokenBones623
How to build it
- Prepare the Station Area and Check Direction
Clear a floor space at least 20 blocks wide and 14 blocks deep, with 5 blocks of height above the floor. Before wiring the back, determine which cardinal direction (North, East, South, or West) you are facing when looking directly at the front control panel, as rail curve rules depend on orientation.
- Build the Front Facade and Selector Panel
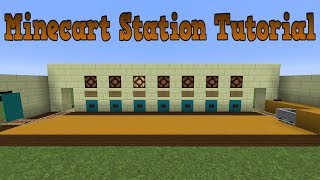
Construct the 3-block-tall front wall frame and leave spaces for the departure bay, return exit, and destination selectors. Place alternating solid blocks and Redstone Lamps along the selector wall (1 block spacing between lamps), top the lamps with a row of solid blocks, and attach a Button onto the front of each lamp.
- Set Up the Departure and Exit Bays
In the departure slot, place a Pressure Plate on the floor with an Iron Bar behind it and a button above. In the return exit bay beside it, install a raised Trapdoor and a lower Slab at the doorway so returning players are cleanly dismounted outside while the empty cart continues to collection.
- Wire the Reset Rail Line Above the Lamps
Behind the selector wall, place Redstone Torches above each Redstone Lamp and build a vertical torch tower up to an overhead horizontal redstone dust line that connects all slices together. Whenever any destination button is pressed, this shared line pulses across every module to reset previously selected lines.
- Install the Dropper Memory Cells
Behind the lower selector blocks, place a row of Redstone Torches (which should turn off) and attach pairs of vertical Droppers facing directly into each other: the bottom dropper facing up and the top dropper facing down. Place a single filler item inside every bottom dropper.
- Build the Selector Output (South/West vs North/East)
Place a Redstone Comparator reading out of each bottom dropper into a block with Redstone Dust. If facing South or West, mount downward Sticky Pistons with two Slime Blocks and a Redstone Block to power the lamp and track beneath; if facing North or East, use downward Sticky Pistons with Redstone Blocks to toggle an inverting Redstone Torch under each lamp.
- Wire the Pressure Plate and Pulse Circuit
Dig below the departure pressure plate and run two Redstone Dust into a block holding a side Redstone Torch. Build an inverted U-shape of blocks with a Redstone Repeater running into a block with two Redstone Torches to split the signal between the dispenser trigger and the departure powered rail.
- Install the Minecart Dispenser and Dropper Elevator
Mount an upward-facing Dropper feeding into a sideways Dropper that points directly into a Dispenser aimed at the departure track. Place a Powered Rail in front of the dispenser (powered by the torch beneath) so a dispensed cart waits while you stand on the plate and launches as soon as you hop in and leave the plate.
- Add the Cactus Return and Hopper Recycler
Run a chain of two Hoppers into the side of the bottom elevator dropper. At the end of the return rail, place a Cactus on Sand with a solid block above it (to prevent growth) adjacent to the hopper so incoming minecarts break on the cactus and automatically cycle back into the storage dropper.
- Lay the Track Intersections and Test
Load your minecarts into the bottom dropper and one into the dispenser, then connect your Powered Rails, standard Rails, and Activator Rail along the back switching junctions above the selector outputs. Press a destination button to verify its lamp lights up and the rail junction switches, then step on the pressure plate and ride out.
How it works
This station combines a multi-output RS-NOR latch bank (built from dropper pairs) with directional rail switching and an automated minecart dispenser:
- Dropper RS Latch Array: Each destination slice uses two vertical droppers facing each other with a single item inside. Pressing a destination button sends a signal down the shared top reset line, triggering all top droppers so any active slice pushes its item back down. At the same time, the pressed button powers the bottom dropper of your chosen slice to shoot its item into the top/active state (or toggles the comparator output depending on orientation).
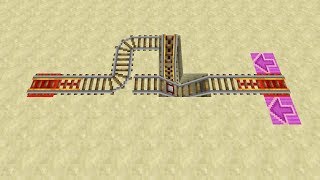
- Directional Rail Switching: Because curved rails in Minecraft follow the South-East rule depending on whether they are powered or unpowered, the tutorial uses two output styles behind the comparator. Facing South or West moves a Slime Block and
Block of Redstoneassembly directly behind the lamp and rail intersection; facing North or East uses a sticky piston and redstone block to invert aRedstone Torchunder the lamp and junction. - Departure & Return Loop: Stepping on the
Pressure Platepulses the dropper elevator andDispenserto place a minecart onto a powered rail while temporarily holding the launch signal. When you board the cart, the pressure plate deactivates, flipping the torch state to launch the cart down the main line. Returning carts dismount the player via anActivator Railand slab barrier before hitting aCactusabove aHopperchain that feeds the item back into the dropper elevator.
Tips & variations
- Check Your Facing Direction First: Curved junctions behave differently along North/East versus South/West axes. Always confirm which direction you are looking when facing the buttons before building the piston output slices on the back.
- Expanding for More Lines: Because each destination is a 2-block-wide slice (one lamp column and one spacer column), you can add as many destinations as you want. If your station exceeds 15 blocks of redstone dust along the top reset line, place a
Redstone Repeaterin one of the spacer gaps (never directly in front of a slice torch) to extend the signal. - Stop the Cactus from Growing: Do not forget to place a solid block two blocks above the sand (directly over the cactus) so the cactus never grows tall enough to obstruct the room or destroy dropped carts outside the hopper range.