Video: Minecraft 1.14.3+ - Compact Minecart Station Tutorial & Redstone Discussion by WeirdWilliam
How to build it
- Dig the Redstone Pit
Behind your passenger platform, dig a pit that is 2 blocks deep and 6 blocks back, plus 4 blocks of ground-level space behind it for the rail junctions. Make the pit wide enough to fit 1-block gaps between each line (up to 7 lines) plus 2 blocks of margin on each side.
- Build the Hopper-Lock Reset Line
Along the front bottom of the pit, place a row of solid blocks. Leaving a 2-block gap on the ends, place a redstone torch on the back of this row for each station line, skipping 1 block between torches. Run a line of redstone dust across the top of those blocks from the first torch to the last.
- Install Droppers and Locked Hoppers
Place a dropper 2 blocks behind each redstone torch, then crouch-place a hopper in between pointing back into each dropper. The redstone torch directly against each hopper will keep it locked by default.
- Add Comparators and Output Torches
Behind each dropper, place a comparator facing away from it into a solid block, and place a redstone torch on top of that block. Put exactly 1 single item (such as 1 dirt block) inside each dropper so the comparator turns on and switches the top torch off.
- Place the 2-Tick Repeaters Above the Hoppers
Two blocks directly above each dropper, place a solid block. Attach a top half-slab to the front of those blocks (above the hoppers) and a row of top slabs in front of them above the bottom reset line. Run redstone dust along the front slabs, and place a repeater set to 2 ticks on each slab leading into the block above the dropper.
- Cap the Output Torches
Place a solid block on top of each comparator's redstone torch at the back of the pit. When a line is selected, this block will become strongly powered to switch the rail junction directly behind it.
- Build the Control Panel Wall
Along the front edge of the pit, build a wall above the row of reset redstone dust, leaving a 1-block doorway on the left and right ends for the departure and arrival tracks. Place a button on the front of the wall aligned with each line's repeater, and place a redstone lamp directly above each button.
- Wire the Indicator Lamps and Note Blocks
Run a bridge of top slabs from above each rear powered torch block forward toward the back of the redstone lamps, placing a solid block directly behind each lamp. Lay redstone dust along the top of the rear torch block and across the slabs into the block behind the lamp; optionally attach tuned note blocks to the sides of that block for a selection chime.
- Lay the Outbound and Return Rail Junctions
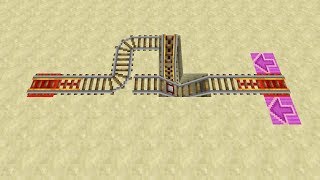
Extend the departure and return tracks from the sides of the control panel around to the 4-block flat area behind the pit. For each line, place a powered rail, a regular curved junction rail directly against the powered block above the rear redstone torch, and another powered rail leading out toward your destination, then test all buttons to ensure each junction flips properly toward your departure side.
How it works
This station combines two core Minecraft mechanics: one-way rail jumping and a multi-button selector panel built from linked dropper-hopper memory cells.
- Reset Bus: Pressing any destination button powers the continuous line of redstone dust along the bottom front of the pit. That dust turns off every bottom redstone torch simultaneously, briefly unlocking all hoppers so any previously selected line returns its single item back into its dropper.
- Dropper-Hopper Latch: At the same time, the pressed button sends a signal through a 2-tick repeater into the solid block directly above that line's dropper. Through quasi-connectivity (BUD powering), the dropper fires its single item into the unlocked hopper. Because the repeater adds a slight delay, the item enters the hopper just as the button pulse ends and the bottom torch turns back on, locking the item inside the hopper.
- Junction & Lamp Output: With the dropper now empty, its comparator turns off, allowing the rear redstone torch to turn on. This powers the block above it—flipping the curved rail junction toward the chosen track and sending power up the slab line to light the redstone lamp (and play any attached note blocks).
- Rail Shunting: Outbound carts hop straight across unselected curved rails until they hit the one curved rail flipped by the active torch. Returning carts from any destination hit the back row of curved rails and are naturally funnelled onto a single shared return track back to the station's activator rail.
Tips & variations
- Bedrock Edition Fix: As noted by the creator, quasi-connectivity does not power the dropper from the block above it in Bedrock Edition. To make this work on Bedrock/Console, simply place a dot of redstone dust directly on top of each dropper.
- Only One Item per Dropper: Make sure you place only a single item inside each dropper. If you put two or more items in, the dropper will still have items left after firing once, keeping the comparator on and preventing the track from switching.
- Directional Rail Quirks: Curved rail junctions default to different orientations depending on whether you build the station facing North/South or East/West. Build the junction rails first and test which way they curve before finalizing which side of the station is the launch bay and which side is the return line.
- Max 7 Lines Without Repeaters: Because a standard redstone dust line reaches 15 blocks and each slice is 2 blocks wide, the reset bus easily supports up to 7 lines without needing extra repeaters.