Video: Automatic RAILWAY STATION System! - Minecraft Tutorial by Cubey
How to build it
- Orient the Floor Plan North
Open your debug screen (F3) and find North. Lay out the station's rectangular floor perimeter so that the entrance gap at the bottom of the plan faces directly North, which is required for the directional rail intersections to switch properly.
- Build the Station Walls and Trench
Raise the walls 4 blocks high directly on top of your floor plan. In the front-right interior corner, dig a 2x6 trench one block deep, plus an extra hole passing under the wall, and trim the top and bottom of the front wall with stone bricks and upside-down stone brick stairs.
- Install the 7 Selection Lamps and Buttons
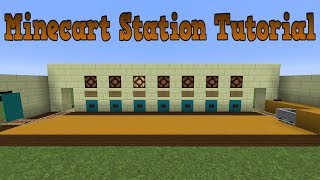
Inside against the front wall, lay a straight line of redstone dust on the floor with a row of solid blocks above it. On the next row up, place 7 redstone lamps spaced one block apart (filling the gaps with solid blocks), then go outside and attach a button on the block below each lamp and a sign above each lamp labeled Stations 1 through 7 from left to right.
- Build the Selector Panel Foundation
Punch a temporary hole above the trench in the right wall and place a redstone repeater facing inward. Behind the front wall, place a white wool block behind and below each of the 7 lamps, a second staggered row of 7 white wool blocks in the gaps behind those, and a third row stacked two blocks high directly behind the first row.
- Wire the Latch Repeaters and Torches
Place redstone repeaters into the gaps of the white wool foundation and right-click each one twice (3-tick delay). Attach redstone torches to the back of the wool pillars and bridge the top with additional white wool blocks to form the 7-output selector memory.
- Add the Lime and Light Blue Circuit Foundations
Extend the foundation behind the white wool using lime wool on the right side (by the trench), placing one upward-facing sticky piston in the trench line. Build out the light blue wool pathways extending from each of the 7 station channels toward the back wall where the rail junctions will sit.
- Run the Redstone Dust, Repeaters, and Comparators
Lay redstone dust along the white, lime, and light blue wool tracks to connect the selector panel to the back wall outputs. Insert redstone repeaters along the channels to maintain signal strength (setting the two timing repeaters on the reset/lime line to 3 ticks by clicking them twice) and place 2 redstone comparators facing opposite directions to form a pulse extender.
- Place the Inverting Torches Using Temporary Levers
Attach 3 temporary levers along the front selector line and flick them on to power the line and turn off the lamps while you work. Place the final set of redstone torches onto the white and colored wool blocks to invert the signals for the rail intersections, then break the 3 temporary levers.
- Build the Departure Dock and Main Track
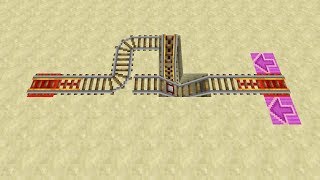
Two blocks away from the right-hand corner stair, build the minecart departure dock with a launch button. Run 8 powered rails out from the dock, curve around the corner with 5 regular rails so the track runs parallel to the back exterior wall, and place 1 detector rail right before the first junction.
- Create the 7 Branching Rail Junctions
Directly after the detector rail, lay a repeating junction pattern of regular curved rails and powered rails aligned with each of the 7 light blue output lines. Repeat this identical rail branching pattern 7 times along the back wall so each station channel controls one turn-off track.
- Power the Tracks and Test
Dig beneath the powered rails along the departure line and the 7 branch exits and place redstone torches underneath to keep them permanently powered. Label the 7 branch tracks from left to right (Station 1 to Station 7), press a destination button on the front panel, hop in a minecart at the dock, and press the launch button to test.
How it works
The station combines a 7-output selector panel (RS NOR latch array) with directional rail junctions and an automatic detector-rail reset line:
- Destination Selection: Pressing any of the 7 buttons on the front wall powers that specific channel while also running along the shared bottom redstone dust line. The shared line triggers a reset across all other latches (enhanced by the upward sticky piston and 3-tick repeaters), ensuring only the newly selected station's redstone lamp stays lit.
- Rail Switching: Each of the 7 memory latches sends a constant signal down its dedicated light blue wool line to the back wall. Through a series of inverting redstone torches, the selected channel flips the curved regular rail at its corresponding junction so that an incoming minecart will turn down that branch instead of continuing straight.
- Departure and Auto-Reset: When you press the launch button at the departure dock, your minecart accelerates across the 8 powered rails and rounds the corner onto the
detector-rail. The detector rail sends a pulse into the lime wool circuit (which uses tworedstone-comparatorblocks as a pulse extender) to hold or clear the state cleanly, returning the junctions to their default straight alignment for return trips.
Tips & variations
- North Orientation is Mandatory: Because curved regular rails in Minecraft follow the South-East / directional rule when unpowered and powered, you must align the floor plan facing North as shown with the F3 screen, or your minecart will turn into the wrong branches.
- Return Trips: By default, because the track intersections reset after departure, riding a minecart back along any of the 7 branch lines will automatically merge you back onto the main line and return you to the departure station.
- Multi-Hub Network: If you want full two-way selection from every outpost, you can build a copy of this departure station at each destination, or simply use simple single-return docks at outposts that feed back into this central hub.
- Keep Tracks Boosted: Remember to place powered rails supported by redstone torches every 30 to 35 blocks along your long-distance branch lines so chest minecarts and players don't lose momentum.