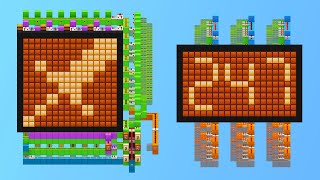
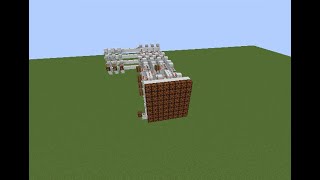
Video: How to make a Minecraft Redstone Lamp Screen & Control Every Pixel at Any Size by ndgo
How to build it
- Build the 2x2 Lamp Pixel
Place four Redstone Lamps in a 2x2 square facing the front of your screen. Using a 2x2 cluster as a single pixel gives you enough room behind the display to wire each pixel without interfering with adjacent ones.
- Add the Lamp Support Blocks
Go behind the 2x2 lamp cluster and place two solid blocks (such as Stone) behind the bottom two lamps, and two more solid blocks slightly stepped back to hold the repeater line.
- Place the Upper Powering Torches
Attach two Redstone Torches to the back of the upper layer so they sit directly behind the top two Redstone Lamps, powering them when active.
- Install and Sync the Repeaters
Place two Redstone Repeaters behind the lower blocks pointing straight into the pixel assembly. Leave one repeater on its default 1-tick delay and set the other repeater to a 2-tick delay (one right-click) so both halves of the pixel turn on and off at the exact same moment.
- Build the Torch Inverter Input
Place a solid block behind the repeaters and attach two Redstone Torches to it: one feeding into the repeater line and one on the back face to invert the state so the pixel stays off by default.
- Attach Your Input Control
Place a Lever, Button, Pressure Plate, or Redstone Block at the back input block to test the pixel. Flipping the lever will invert the torch line and light all four lamps of the 2x2 pixel simultaneously.
- Tile Horizontally and Vertically
Repeat this exact 2x2 module directly next to and on top of your first pixel to build a full screen of any size, such as a 16x9 grid, then run your input lines back to a central control panel.
How it works
A single 1x1 redstone lamp cannot easily be tiled in a dense grid without complex wiring because strongly powering a block next to a lamp will also activate adjacent lamps. By treating a 2x2 block of Redstone Lamps as one single pixel, you gain a 2-wide by 2-high footprint behind every pixel to contain the redstone signal.
- Signal Inversion: The rear Redstone Torches act as a NOT gate (inverter), holding the pixel in an OFF state until an input signal is applied to the back block.
- Vertical Split: Inside the 2x2 module, the upper lamps are powered by Redstone Torches while the lower path is routed through Redstone Repeaters into solid blocks.
- Tick Synchronization: Because a Redstone Torch takes 1 redstone tick (2 game ticks) to invert, setting one repeater path to 2 ticks and the other to 1 tick compensates for the torch delay. This prevents awkward tearing or "V-Sync" flicker, causing all four lamps in the pixel to illuminate on the exact same tick.
Tips & variations
- Materials Note: The materials list covers one 2x2 pixel module. Multiply the quantities by the total number of pixels in your screen (for example, multiply by 144 for a full 16x9 pixel display).
- Syncing the Flash: If the top and bottom halves of a pixel light up slightly out of sync, double-check that one repeater is set to 2 ticks so it matches the 1-tick delay of the redstone torch line.
- Flexible Inputs: Because each pixel module ends in a single input block, you don't have to use levers. You can trigger pixels using Stone Pressure Plates (for players or mobs to walk on), Wooden Pressure Plates (triggered by dropped items), Buttons, or long redstone lines leading to a drawing board control panel.