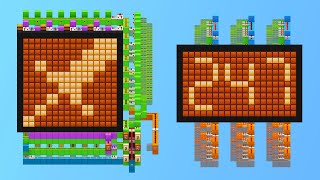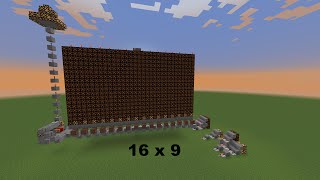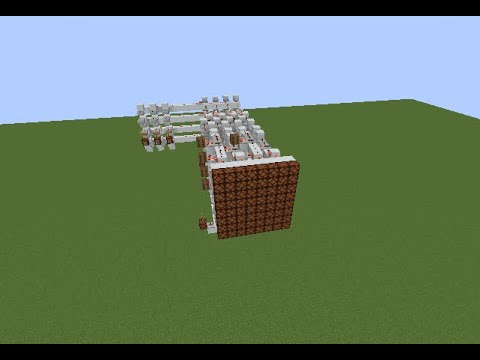
Video: Minecraft Redstone 2x2 Pixel Display Tutorial by 75rx
How to build it
- Build the 2x2 Pixel Lamp Screen
Create your screen out of redstone lamps grouped into 2x2 clusters (each 2x2 cluster acts as a single pixel). Stack these clusters into a 4x4 pixel grid (8x8 lamps total) and place repeaters behind the clusters to power all four lamps of a pixel simultaneously.
- Set Up the Barrel and Comparator Memory Cells
Behind each pixel input, build a small platform and place a barrel containing exactly one item of any kind. Run a redstone comparator out of the barrel in subtraction mode (front torch lit), followed by a repeater and redstone dust leading toward the pixel's lamp driver.
- Stack the Display Layers Vertically
Repeat the barrel, subtraction comparator, and repeater assembly for each row of pixels. Use solid blocks and redstone torches in between the vertical layers to isolate the rows and pass power cleanly into each 2x2 lamp group.
- Wire the Write Function Line
Run a vertical slab tower alongside the subtraction comparators for the screen memory. Use redstone torches underneath the blocks and redstone dust to link the side inputs of these comparators into a single master 'Write' button line.
- Extend Pixel Inputs with Slab Lines
Behind each pixel unit, step down using slabs or glass blocks lined with redstone dust and repeaters. This keeps the vertical layers separated so each pixel has an independent input line ready to connect to the memory buffer.
- Construct the RS NOR Latch Memory Buffer
Further back on each pixel line, build an RS NOR latch using two opposing redstone torches on solid blocks with redstone dust and repeaters looping between them. This secondary memory acts as your 'Save to Memory' buffer, holding drawn pixels before you push them to the screen.
- Connect the Clear Function and Delay Chain
Place repeaters going into the reset side of every RS NOR latch and wire them all together using slab towers to a single 'Clear' button. Branch off this clear line with a long chain of repeaters set to roughly 20 to 24 ticks of delay leading into the Write line, so the screen updates automatically right after the memory latches wipe.
- Install the Save-to-Memory Comparators
Behind the RS NOR latches, place another set of comparators set to subtraction mode with redstone dust running between them. Run an inverted redstone torch line underneath to control all their side inputs simultaneously, and wire it to a 'Save to Memory' button.
- Build the Y-Coordinate Binary Decoder
At the back of the machine, build horizontal decoder lines for your Y coordinates using binary input levers (1, 2, 4). Along each row's selection line, place redstone torches where a binary bit should be active and repeaters where it should be bypassed so each Y coordinate targets a specific horizontal row.
- Wire the X-Coordinate Levers and Test
Route the vertical column lines down to a bank of X-coordinate levers and invert the inputs with redstone torches so unselected lines keep the coordinate gates locked. To draw, select your X and Y levers, press 'Save to Memory', repeat for any other pixels, and finally press 'Write' to display the image on the lamps.
How it works
This display relies on a dual-memory architecture and coordinate gating so you can assemble complex shapes one pixel at a time without causing flickering on the screen:
- X/Y Coordinate Addressing: The Y input uses a binary torch-and-repeater decoder to select a horizontal row, while the X levers select vertical columns. Where an active X line and Y line intersect, the corresponding pixel path is unlocked.
- Save to Memory (RS NOR Latch Buffer): Pressing the
Save to Memorybutton briefly unlocks a row of subtraction comparators, allowing the currently selected X/Y coordinate signal to set an RS NOR latch. You can change coordinates and save multiple pixels into these latches one after another. - Write Function: Each pixel on the screen is powered by a barrel holding 1 item (emitting signal strength 1) read by a comparator in subtraction mode. Normally, a side signal subtracts from the comparator and blocks the output. Pressing
Writepulses the latch states into the front memory stage, locking the chosen pixels on. - Clear Function: Pressing
Clearsends a pulse to the reset side of every RS NOR latch to wipe the buffer, while simultaneously sending a ~20-tick delayed pulse to theWriteline to push the blank state onto the screen.
Tips & variations
- Barrel Alternatives: If you are playing in a version prior to Minecraft 1.14 where barrels do not exist, you can substitute them with furnaces, chests, or hoppers containing a single item.
- Ctrl + Pick Block: In Creative mode on Java Edition, hold
Ctrland middle-click a barrel that already has one item inside to copy the block along with its inventory NBT data. This saves you from filling every barrel manually. - Transparent Blocks for Vertical Wiring: Always use top slabs, glass, or glowstone for the vertical wiring towers so you don't accidentally cut off your redstone dust lines while routing signals up and down.
- Signal Strength Management: When stacking this display to larger resolutions, place repeaters every 15 blocks along the decoder, Save, Write, and Clear buses so the signal reaches the top rows.