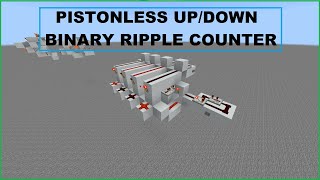
Video: Redstone Counter Tutorial by xisumavoid
How to build it
- Build the Pulse Shortener Base
Place four solid blocks in a row. Put a line of redstone dust on top of them, with a redstone repeater at the output end leading toward where your counter line will go.
- Add the Torches and Delay Repeater
Attach two blocks to the side of your four-block row with a one-block gap between them, and place a redstone torch on each so both power the dust line. Place a repeater between those two blocks facing from the input side toward the second torch block.
- Attach the Input Button
Place a button on the side of the first torch's block. Pressing this button will turn off the first torch immediately and the second torch after a delay, creating a brief off-pulse on the output line.
- Lay the Locking Bus Line
Connected to the output of your pulse shortener, place a straight row of seven blocks. Run redstone dust across the top of all seven blocks.
- Place the Repeater Support Blocks
Behind the first block of your seven-block row, extend two blocks backward. Repeat this on every other block along the row so you have four pairs of blocks spaced one block apart.
- Install the Locking Repeaters
On the blocks closest to the seven-block dust line, place redstone repeaters facing forward into the memory row. Because the dust line is powered by default, these repeaters will stay on and lock the repeaters placed in front of them.
- Install the Memory Loop Repeaters
On the second row of blocks, place repeaters facing perpendicular to the first set so that each repeater points into the next output block down the line. Set all of these memory repeaters to their full 4-tick delay.
- Wire the Output Blocks and Loop Return
Place solid blocks in front of each memory repeater to act as your outputs (you can attach redstone torches or lamps to indicate the selected state) and wire the dust so each output feeds into the next locked repeater. Run a return redstone line from the final output all the way back to the first memory repeater.
- Prime the Counter with a Signal
Temporarily place a redstone torch at the beginning of the loop to feed power into the first memory repeater. Press the input button once to lock that power into the first slot, then break the temporary priming torch.
How it works
This circuit functions as a shift-register ring counter using repeater locking:
- Default Locked State: The two redstone torches on the input pulse shortener keep the main bus line constantly powered. This powers the front row of repeaters, which point directly into the sides of the 4-tick memory repeaters, keeping them locked in their current state.
- Inverted Pulse Generation: When you press the button, the first torch turns off right away while the repeater delays turning off the second torch. For a brief moment both torches are off simultaneously, creating a short off-pulse along the locking bus.
- Shifting the Output: Only one memory repeater is locked in an active (powered) state, powering the block in front of it. When the locking repeaters briefly turn off, the active output block pushes its signal into the next memory repeater before the bus turns back on and locks the entire row again.
- Looping Back: A return wire connects the final output back to the first memory repeater, allowing the single active signal to cycle endlessly.
Tips & variations
- Expanding the Counter: For every additional output slot you want to add beyond four, bring 7 building blocks, 4 redstone dust, 1 redstone torch, and 2 redstone repeaters. If your counter becomes very long, add extra repeaters along the lines to extend the signal strength.
- Flexible Return Wiring: You can route the return wire around the outside of the build or dig it underneath the circuit to keep the footprint compact.
- Common Mistake: If pressing the button does nothing after building, remember that the loop starts completely empty. You must prime the first repeater with a temporary redstone torch and press the button once to load a single pulse into the memory loop.