
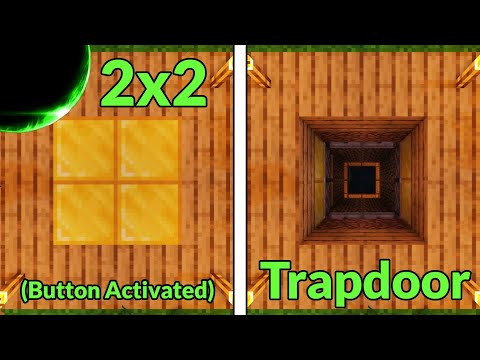
Video: How to Build a 2x2 Trapdoor (Java & Bedrock Editions) | Minecraft Redstone Engineering Tutorial by ZennsWorld
How to build it
- Clear the Underground Space
Mark your 2x2 trapdoor floor blocks. Dig out 4 blocks of clearance on two opposite sides, 2 blocks on the third side, 3 blocks on the fourth side, and excavate 4 blocks deep below the floor level.
- Place the Button
From one corner of your 2x2 floor area, move two blocks along one edge and one block outward, then place your button on the ground. Dig a single block space directly beneath the block the button sits on and place a piece of redstone dust there.
- Install the Upward Floor Pistons
Place 4 sticky pistons facing straight up beneath your 2x2 floor blocks, leaving a 1-block air gap between the retracted pistons and the floor blocks so they sit flush when extended.
- Add the Side Puller Pistons
On the two 4-block wide sides, place 2x2 walls of sticky pistons (4 on each side) facing inward toward the vertical pistons and the 1-block gap above them, leaving a 1-block air gap so they can grab both the upward pistons and the floor blocks.
- Wire the Side Pistons (Java vs. Bedrock)
Place two solid blocks behind the top row of side pistons on both sides. In Java Edition, place two 1-tick repeaters on those blocks facing into the top pistons with redstone dust behind them; in Bedrock Edition, replace those repeaters with redstone dust so both the top and bottom rows get powered.
- Place the Inverter Torch and Redirect Dust
Attach a redstone torch to the side of the block under the button (facing toward the trapdoor). Place one extra piece of redstone dust next to the dust under the button to redirect it away from the side pistons so it does not accidentally power them when pressed.
- Connect the Near Upward Pistons
Place two 1-tick repeaters facing into the near side of the upward-facing sticky pistons (in their extended position) and connect their inputs to the redstone torch with redstone dust.
- Add 4-Tick Delay Lines to the Side Pistons
Run two redstone dust lines from the redstone torch out to the two 4-piston side banks. On the side near the button, dip the line down two blocks to bypass the button dust, and put a 4-tick repeater on each side feeding into the side piston wiring.
- Tunnel Under to the Far Upward Pistons
Dig a trench directly underneath the four central upward pistons and run a line of redstone dust from the redstone torch to the far side. Place two 1-tick repeaters on the far side facing into the other two upward pistons and connect them to this underground dust line.
- Test and Cover the Redstone
Press the button to confirm the floor retracts downward, pulls into the walls, and closes smoothly once the button pops out. Fill the floor back in over the wiring, taking care not to place solid blocks on step corners that would cut off any diagonal redstone dust lines.
How it works
The entire door is normally held closed by a single redstone torch located under the button block:
- Default (Closed) State: The redstone torch is ON. It powers both the 4-tick repeaters leading to the left and right horizontal sticky pistons (pushing the central pistons and floor blocks into the center) and the 1-tick repeaters leading to the spots where the vertical sticky pistons sit (pushing the 2x2 floor blocks up flush with the ground).
- Opening Sequence: Pressing the button powers the block under it and turns the redstone torch OFF. Because the upward pistons only have a 1-tick repeater delay, they unpower and retract the floor blocks downward first. Three ticks later, the 4-tick repeaters turn off, allowing the side sticky pistons to retract both the lowered floor blocks and the vertical pistons into the walls, opening the 2x2 shaft.
- Closing Sequence: When the button pulse ends, the torch turns back ON. The 1-tick repeaters fire early while the vertical pistons are still tucked away in the walls, and then the 4-tick repeaters extend the side pistons. As soon as the vertical pistons are pushed back into the middle, they touch the already-powered 1-tick repeaters and immediately push the 2x2 floor blocks back up flush with the ground.
Tips & variations
- Java vs. Bedrock Side Wiring: In Java Edition, powering the top sticky piston with a repeater also powers the piston below it through quasi-connectivity. Because Bedrock lacks quasi-connectivity, replace those two repeaters on each side with redstone dust; in Bedrock, dust automatically redirects into the pistons and powers both rows.
- Stay Open Longer: A stone button gives a short 10-tick pulse, which is enough time to fall through if you stand near the door. Swap to a wooden button (15-tick pulse) if you want the trapdoor to stay open slightly longer.
- Don't Cut Off Dust Lines: When covering the floor back up, check every 1-block drop in your redstone dust paths. Placing a full block directly above the lower dust in a staircase will sever the connection and leave one side stuck.
- Basement Ceiling Clearance: Because a redstone line runs right below the central upward pistons, build your basement ceiling at least one block below that lowest redstone line so you don't break the wiring when decorating.


