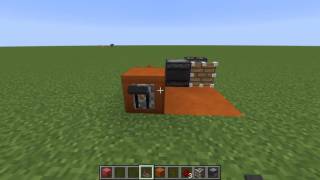
Video: Tutorial: Observer Clock (Minecraft Vanilla 1.12) by JoeCool FlyingAce
How to build it
- Place the Base Block and First Rail
Start by placing a solid building block on the ground and putting a single powered rail on top of it.
- Position the Observer
Place an observer facing directly into that powered rail so its face watches the rail and its output dot points backward.
- Loop the Powered Rails
Place a solid block directly behind the observer's output, then place two more powered rails underneath so all three rails connect into a continuous sloped track between the observer's output and face.
- Add a Manual Toggle Switch
Attach a lever to one of the supporting blocks or directly adjacent to the powered rails; flipping the lever ON keeps the rails continuously powered and stops the clock, while flipping it OFF lets the clock pulse rapidly.
- Attach a Dropper Output
To use the clock for an item elevator or dispenser system, place a dropper on top of the solid block behind the observer so it gets pulsed every time the clock ticks.
- Set Up Automatic Comparator Control (Optional)
For an auto-triggering item elevator, place a redstone torch on the side of the rail block to hold the rails powered (locking the clock off by default), then run a comparator reading out of the dropper into a block with redstone dust that turns the torch off whenever items enter the dropper.
How it works
This circuit relies on how observers interact with powered rails:
- When a powered rail changes state between powered and unpowered, the observer looking at it detects the block state update and emits a 1-tick redstone pulse from its back output.
- That pulse powers the solid block behind the observer, which immediately activates the connected line of three powered rails.
- Because the observer is watching one of those three rails, it sees the rail turn on and then immediately turn off again as the short pulse ends, creating a self-sustaining fast clock loop.
- Applying a constant redstone signal (from a lever or a resting redstone torch) forces the powered rails to stay in their ON state permanently. Since the rail state stops changing, the observer stops firing.
- In the item elevator configuration, a redstone comparator reads the dropper's inventory. When items are present, the comparator powers a block that inverts/disables the locking signal, allowing the rails to flash and pulse the dropper until it is completely empty.
Tips & variations
- Why use powered rails? Unlike redstone dust, powered rails do not cause hundreds of neighbouring block updates when changing signal strength from 15 down to 0, making them significantly better for framerate and server performance.
- Silent operation: Unlike dual-observer clocks toggled by a sticky piston, switching this clock on and off with a torch or lever makes no piston noise.
- No torch burnout: In the automatic dropper setup, the redstone torch only toggles once when items enter and once when the dropper empties, rather than flashing constantly with every item.
- Rail orientation: Make sure the three powered rails slope and connect to one another. If nearby rails snap them in the wrong direction, break and replace them so they form a single connected line.