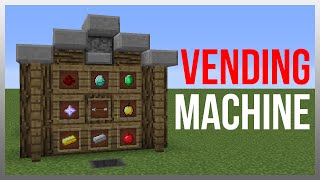
Video: Simple Vending Machine (Easy Redstone) by idleGaming
How to build it
- Dig the T-Shaped Trench
Clear out a 6x7 work area and dig a T-shaped trench into the ground. Dig down an extra block along the stem of the T so the items flow forward toward the player.
- Line the Floor with Ice
Replace the bottom blocks of your T-shaped trench with ice. Items slide much faster across ice when pushed by water streams.
- Place and Fill the Dispensers
Place four dispensers along the back wall of the top bar of the T, facing into the trench. Fill each dispenser with the items or armor pieces you want to vend.
- Build the Button and Sign Wall
Place two rows of solid building blocks directly above the dispensers to form the front wall. Attach four buttons across the bottom row aligned with the dispensers, and place signs above them to label your items.
- Add the Water Streams
Place water source blocks at the outer ends of the top bar of the T so the water flows inward toward the center intersection and down the stem toward the front.
- Wire the Button Repeaters
Behind each button on the back of the wall, extend a line of solid blocks backward above the dispensers. On each line, place a repeater on 1 tick, followed by two more repeaters set to 4 ticks each.
- Connect the Rear Redstone Line
Run a line of redstone dust across the backs of all four repeater lanes to join them together. Make sure the dispensers below are powered when their respective button is pressed.
- Install the First Pusher Piston
Near the center of the T-junction, place a sticky piston facing downward (or inward) with a solid block attached to its face. Connect it to the shared redstone line using a chain of repeaters all set to 4 ticks for a long delay.
- Dig the Underground Wire Tunnel
From the end of the upper repeater line, dig a staircase down 3 blocks and tunnel forward 8 blocks underneath the water trench. Temporarily block the water above if needed so you do not flood your redstone while digging.
- Install the Pop-Up Delivery Piston
At the front end of the water stream, place an upward-facing sticky piston under the floor with a solid block on top of it. Wire your underground tunnel to this piston using three more repeaters set to 4 ticks and redstone dust.
- Seal the Floor and Test
Replace any broken ice blocks in the trench and remove your temporary water-blocking blocks. Press each button to verify the item shoots out, slides down the ice, and gets popped up to the surface for easy collection.
How it works
This vending machine combines simple item transportation with timed piston delays:
- Item Dispensing: Pressing any of the four buttons sends a redstone pulse through the block to trigger the corresponding
dispenserbelow it, dropping the selected item into the water stream. - Fast Water Transport: Because the trench floor is made of ice, the water current carries the dropped item quickly to the central channel and forward to the collection point.
- Delayed Piston Delivery: The same button press travels into a shared redstone dust line and through multiple 4-tick
redstone-repeaterchains. The first delayed sticky piston helps push the item along the channel, while the underground repeater line delays the signal just long enough for the item to arrive over the final upward-facingsticky-piston, which then extends to pop the item up to the player.
Tips & variations
- Don't Flood Your Redstone: Always block off the water source before breaking any ice or wall blocks around the trench while digging the underground redstone line.
- Use Packed Ice: In modern versions of Minecraft, replace regular ice with Packed Ice or Blue Ice so it never melts from nearby torches or lighting.
- Adjusting Timing: If the pop-up piston extends too early or too late, adjust the tick delay on the underground repeaters until the piston fires right as the item lands on top of its block.