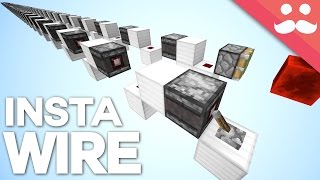
Video: Robust Instant Wire | Minecraft by Kahyxen
How to build it
- Choose a Build Direction
Orient yourself so you are building from a positive to negative coordinate direction (along either the X or Z axis). This makes sloping the powered rails in the diode much easier.
- Build the 2-Wide Observer Diode Frame
Construct the 2-block-wide module support blocks and place the two observers (Observer A and Observer B) so that one reads the rail state and the other powers the rail diode setup.
- Lay the Straight Powered Rails
Between each 2-wide observer module, place a line of 8 flat powered rails on top of solid blocks (making a 10-block repeating unit for maximum reliability).
- Configure the Ascending Rail Diode
At the 2-wide observer junction, place powered rails so one slopes upward toward the upper observer block without connecting into a continuous track that would un-slope it.
- Prime and BUD the Module
Briefly power the top rail of the diode (using a temporary redstone block or breaking and replacing the observer) so the rail line turns on and enters a BUDded state where the rails remain powered even after the source is removed.
- Add Safe Tail Ends
Place an extra 2-wide observer diode module at both far ends of your instant wire line, and trigger or read signals only from the inner sections of the line.
- Test with an Input Trigger
Place a note block or updater next to any powered rail inside the line and trigger it. The entire rail line will instantly unpower and repower within the same game tick, resetting in 4 game ticks.
How it works
Traditional powered rail instant wires require a dedicated tail at the end of the line to put the rails into a Block Update Detector (BUD) state, which can easily desync and turn into an unstoppable clock. This design uses a rail diode mechanic (credited to Inspector Talon) so that every 10-block module BUDs itself independently.
- Rail Diode BUD State: When the elevated rail in the 2-wide junction is powered, it powers up to 9 rails along the line. Because of how sloped powered rails check for power from adjacent rails, turning off the initial power source leaves the lower rails in a powered, BUDded state waiting for a block update.
- Instant Propagation: When you update any powered rail along the line (for example, by hitting an adjacent note block), the farthest rails update first, immediately collapsing the BUDded rail line to off.
- 4-Game-Tick Reset: In each 2-wide module,
Observer Adetects the rail turning off and fires beforeObserver Bwithin the very same game tick. They pulse the diode in sequence to re-power and re-BUD the entire module automatically in 4 game ticks without creating a runaway clock.
Tips & variations
- Keep Modules to 10 Blocks: While a single module can stretch up to 17 blocks wide (the 9-rail power limit from both sides), keeping the repeating unit to a 2-wide observer section plus 8 rails (10 blocks total) prevents the middle rails from entering weird states.
- Building Negative to Positive: If you must build from negative to positive coordinates, you will need to place temporary rails to force the ascending rail to slope in the right direction, then remove the helper rails. You can also simply mirror the modules—the wire works identically.
- Easy Corners & Intersections: Because the rail line is completely directionless and can be updated from any active powered rail, you can branch the rails into 90-degree corners, T-junctions, or 4-way intersections without special repeater logic.
- Instant Dropper Lines: You can run a chain of droppers underneath the wire powered by observers reading the rails (including reading directly from the ascending rail at the transition zones) to transport items instantly in either direction.