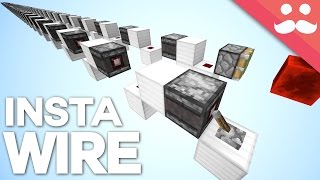
Video: INSTANT VERTICAL REDSTONE: Actually instant, both upwards and downwards, 1-tick redstone signalling by brockade
How to build it
- Test Rail Sloping Direction
Place a quick stepped test of glass blocks and powered rails to check your world orientation. Rails naturally prefer sloping in one direction over the other; align your build so the main module goes toward the direction the rails slope more easily.
- Place the Bottom Rail
Place your bottom support glass block with a powered rail on top. Place a temporary glass block and rail right next to it so the bottom rail stays flat and does not curve upward toward the upper rail.
- Add the Observer Pair
Place a disposable block above the bottom rail area and place two observers pointing into that block/rail line so they chain into each other. Break the disposable block when done.
- Place and Prime the First Top Line
Lay a row of support glass blocks and powered rails across the top of the module. Briefly place and remove a redstone block (or redstone power source) behind the observer to prime the rails into their budded state.
- Build the Diagonal Connector
From the end of the first module, step four glass blocks diagonally up and out to the side. Lay powered rails up this diagonal staircase, placing one extra rail at the top end to force the diagonal rails to slope upward.
- Start the Second Level Platform
From the top of the diagonal, place three glass blocks horizontally back inward. Place a temporary block at the end and install two observers in the same arrangement as the first module.
- Add the Second Bottom Rail
Place a glass block two blocks below the observer with a powered rail on top. Extend one glass block and rail to the side before connecting the upper line so this bottom rail remains flat and does not slope up.
- Connect and Prime the Second Level
Run powered rails across the three horizontal glass blocks to connect with the diagonal. Update the line once so it turns off, then briefly power the back of the observer to lock the second level into its primed state.
- Repeat to Desired Height
Repeat the four-block diagonal staircase, the three-block inward horizontal shelf, the two observers, and the flat bottom rail for as many vertical levels as you need, priming each new section from behind its observer.
How it works
This circuit is a vertical adaptation of Kahyxen's robust horizontal instant rail wire (using Inspector Talon's rail diode concept). It relies on BUD-powered (Block Update Detector) powered rails:
- Rail Diode Priming: Each module has an upper rail line and a flat single rail underneath. When powered in sequence and then unpowered, the upper rail line stays powered even though its power source is gone, waiting in a budded state.
- Instant Cascade: The moment any block update hits the rail line, the budded rails realize they should be unpowered and turn off simultaneously in the exact same tick, cascading up and down the connected modules.
- Observer Re-priming: As the rails flash off, the pair of observers in each module detects the change and pulses the upper rail first and the bottom flat rail second. This automatically re-primes the entire line back into its budded state so it is immediately ready for the next trigger.
Tips & variations
- Other Vertical Methods Shown in the Video: The video also demonstrates three alternatives: Wall Stone (instant downwards only by updating a wall with a trapdoor), BUDded Slime Stone Pistons (redstone blocks on slime blocks with a glass block to pass updates), and BUDded Note Blocks (toggled with a movable target block).
- Taking Output with Pistons: If you place a piston directly beside the rail line, the piston movement will send a second block update back into the rails, causing a double flicker. To get a clean single pulse, place the piston underneath a rail support block—the rail updates the piston downward, without the piston re-updating the rail.
- Horizontal Branches: You can extend up to 6 extra rails off the back of any observer in the tower to create horizontal inputs or outputs at any floor.
- Java Edition Only: Rail budding and quasi-connectivity observer re-priming rely on Java Edition update order and will not work on Bedrock Edition.