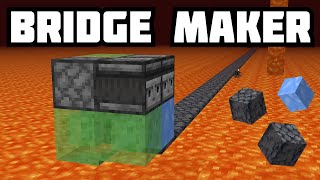
Video: The Working DRAWBRIDGE! [Minecraft Bedrock 1.21] Tutorial by Tomco
How to build it
- Prepare the Trench and Bridge Deck
Clear a deep trench at least 3 blocks below your ground level to house the flying machine, with extra room on the storage side for the retracted bridge. Build your 2-wide, 12-block-long bridge deck (10 walkable blocks plus 2 end blocks), placing a glazed terracotta block on opposite diagonal corners of the ends. Clear an extra layer of floor blocks directly beneath where the slime blocks will travel so they do not snag on the ground.
- Build the Front Pusher Assembly
Under the front end of the bridge, arrange 4 slime blocks into a T-shape. Attach a sticky piston facing into the storage side and an upward-facing observer on the opposite side. Add one more slime block on the side opposite the glazed terracotta and attach two regular pistons facing the bridge deck to push the walkway blocks.
- Add the Front Observer Triggers
Using a temporary block underneath, place an observer facing into the bottom slime block, with a sticky piston underneath it facing the same direction as your first sticky piston. Place another observer on top of that sticky piston facing the block (temporarily break and replace the slime block if needed to get the angle right). Place an obsidian block right in front of the machine to lock it in place while you build.
- Construct the First Drive Engine
Extending back from the lower sticky piston, place a line of 3 slime blocks with 1 extra slime block attached to the side. Weave the drive assembly together by placing an observer facing the slime block with a sticky piston in front of it, another sticky piston facing into that block from the other side, and a third sticky piston on top. Finish the engine core on the opposite side with two observers and a sticky piston facing into the slime.
- Add the Center Coupling
Place a 2x2 square of slime blocks in the middle of the trench behind the first engine. Temporarily break the two bridge blocks directly above them so you can place two observers facing straight downward into the 2x2 slime square, then replace your bridge blocks.
- Mirror the Rear Drive Engine
Build an identical, mirrored copy of the drive engine and T-shaped pusher on the back end of the machine. Include the mirrored L-shapes of slime blocks, the opposing sticky pistons and observers, the upward-facing observer, and the two regular pistons pointing inward toward the opposite end of the bridge deck. Place a temporary obsidian block at the rear end so the finished flying machine cannot move yet.
- Wire the Far-Side Minecart Trigger
On the destination side of the gap, place a building block with redstone dust on top, leading into a downward-facing sticky piston with an observer attached to its face. Place another redstone dust next to an upward-facing regular piston, put a rail and minecart on top of that piston, and break the rail so the minecart rests directly on the piston. Add a block above with a button for your input, and mount a tripwire hook on a block beside the downward sticky piston.
- Wire the Storage-Side Launch Circuit
Move to the home side and place three glazed terracotta blocks to hold the wiring without sticking to the slime. Place a redstone repeater set to 3 ticks facing the machine's rear observer, connect it with redstone dust to a second repeater also set to 3 ticks, and add one more dust with a block on top. These two repeaters handle launching the machine forward and triggering the return piston.
- Connect the Tripwire Signal Line
Above the storage-side redstone dust, place an upward-facing observer with a sticky piston three blocks above it and a button input on top. Place your second tripwire hook on top of that sticky piston and run a line of string all the way across the trench to link both tripwire hooks together until they click flat.
- Set the Obsidian Stopper and Test
Make a backup copy of your world in case a piston is misoriented. Break the temporary rear obsidian block and move it 11 blocks back down the trench to act as the permanent rear stopping point. Press the button to test the drawbridge extending and retracting across the gap.
- Decorate with Non-Stick Blocks
Line all walls, floors, and corners directly adjacent to the slime blocks' travel path with glazed terracotta, shulker boxes, or obsidian so the machine doesn't grab the scenery. Fill in the remaining walkways and walls around the tripwire string with regular building blocks, leaving the tripwire hooks uncovered.
How it works
This drawbridge separates the walkable bridge deck from the propulsion mechanism below:
- Two-Way Flying Machine: Because Minecraft pistons have a 12-block push limit, a single piston cannot push a 10-block bridge from one shore. Instead, a bidirectional flying machine travels underneath the bridge. Two regular pistons on each end of the machine clamp the 2x10 bridge deck between them and slide it back and forth 11 blocks until the machine hits an immovable
obsidianstopper. - Dual-Repeater Docking Station: On the home shore, two
redstone-repeatercomponents set to 3 ticks split the activation signal. Depending on whether the flying machine is parked at the front or back, one repeater updates the rear observer to launch the bridge forward, while the other triggers the return sticky piston to send it backward. - Tripwire Cross-Gap Transmission: Instead of running a long delay line of repeaters under the moat, the buttons on both shores use a
tripwire-hookand string line. When a button pushes or pulls the hook block, the tripwire updates instantly across the gap, allowing either button to trigger the flying machine from across the trench.
Tips & variations
- World Backup Before Testing: Flying machines in Bedrock Edition can misalign if a single observer or piston faces the wrong way. Always copy your world before removing the temporary obsidian lock for the first test.
- Adjusting Bridge Size: You cannot make the bridge longer than 10 walkable blocks (12 blocks total) due to the 12-block piston push limit. However, you can make it shorter, or build two identical modules side-by-side (using honey blocks on one and slime blocks on the other) for a 4-wide drawbridge.
- Watch the Tripwire: Do not jump down into the trench onto the string line connecting the two tripwire hooks—stepping on the string will accidentally trigger the bridge to move.
- Preventing Wall Snags: Always use Glazed Terracotta, Obsidian, or Shulker Boxes anywhere the slime blocks touch the walls. If a rear observer pushes a terracotta block out of your wall when docking, reroute that input using an upward-facing observer and sticky piston beneath the floor.