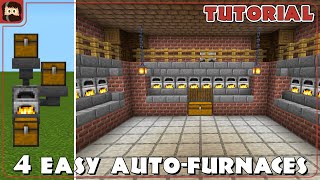
Video: Advance Auto Smelter Tutorial | Easy & Compact | Minecraft Bedrock 1.17+ by Rocket Builder
How to build it
- Set Up Output Chest and Furnace Array
Place a double chest at the bottom front for your smelted output, with a line of hoppers feeding into it. Place your furnaces (such as 4, 8, or 14) on top of those hoppers, then attach a hopper into the top of each furnace for smeltable items and a hopper into the back of each furnace for fuel.
- Position the Input Chest and Control Lamp
Above the front-left side of your array, place your top input double chest and a Redstone Lamp with a lever on it to act as the main on/off switch. Leave space extending 3 blocks out to the side of the hoppers to serve as the minecart loading station.
- Build the Comparator Detection Line
Behind each fuel hopper, place a solid block against its side, step down one block, and extend a 4-block row of solid blocks straight out the back. On top of each 4-block row, place a comparator reading the fuel hopper, leading into redstone dust, a repeater, and another piece of redstone dust.
- Install the Dropper Latch Slices
Directly beneath the first redstone dust of each slice, place a dropper facing straight down, skip a block downward, and place a second dropper facing straight up into the first one. Put 1 junk item inside every top dropper.
- Wire the Hopper Locking Torches
On the side of the droppers closest to the furnaces, place a solid block with a comparator reading the bottom dropper into a block with a redstone torch on its edge beneath the fuel hopper. On the opposite side of the droppers, place another comparator reading the dropper into a block with a redstone torch on top.
- Build the Array Reset Circuit
From the back redstone dust line, step down using a vertical torch tower of two redstone torches and dust to reach the bottom level of the array. Run this signal through a repeater into a shared line of redstone dust that powers a row of forward-facing repeaters (one per slice), each pointing into a solid block with a redstone torch on top under the bottom droppers.
- Add the Piston Safety Net
Beside the row of locking torches under the fuel hoppers, place one regular piston per slice facing sideways down the line, and place an immovable Obsidian block at the far end so the pistons cannot push anything. Run a line of redstone dust along the back of these pistons and place a redstone torch directly on top of each piston.
- Lay the Upper and Lower Rail Tracks
Extend the support blocks 2 blocks past the far end of the hoppers. Lay the lower fuel track across the back fuel hoppers using powered rails, except at the input station where you place two powered rails, a normal rail, and a detector rail (extend the track by 1 extra rail while building so Bedrock rails do not curve into the upper track, then remove the extra rail and place end stops). Lay an upper track of powered rails across the top hoppers and power both tracks with Redstone Blocks.
- Build the Detector Rail Subtract Clock
Take a comparator output in subtract mode through a solid block from the lower track's detector rail and run it into a block with redstone dust. Connect this dust into two 4-tick repeaters leading into a loop of six 4-tick repeaters that feeds back into the side of the subtract comparator.
- Connect the Clock to the Safety Net
Place a redstone torch on the side of the subtract clock's output block and step the signal down twice using redstone dust and two more redstone torches. Connect the bottom dust directly into the redstone dust line running behind your safety-net pistons.
- Wire the Start Switch and Minecarts
Behind the Redstone Lamp with the lever, run a 4-tick repeater into a block with redstone dust, and place a downward-facing sticky piston with an observer next to it to pulse the lower fuel rail when switched on. Place a hopper above the lower starting rail to feed fuel into a Hopper Minecart on the lower track, and place a Minecart with Chest on the upper track below your item input chest.
How it works
This circuit ensures 100% even fuel distribution by locking each fuel hopper the moment it receives an item and waiting until every single slice has received one fuel item before releasing them together:
- Fuel Detection & Locking: As the
Hopper Minecarttravels across the back fuel hoppers, it drops one item into each hopper. The rearRedstone Comparatordetects the item inside the fuel hopper and powers the topDropper, pushing the junk item down into the bottom dropper. - Dropper Memory Latch: A comparator reads the bottom dropper and turns off the
Redstone Torchunder the fuel hopper, which immediately locks the fuel hopper so it cannot accept a second item on the next minecart pass. At the same time, the rear comparator and torch turn off the slice's connection to the back redstone line. - Global Release (Reset): Because all slices share the back redstone dust line, that line stays powered as long as at least one furnace still needs fuel. Once the final furnace receives its fuel item, the back redstone line completely unpowers. This flips the vertical torch tower at the side and powers the bottom row of repeaters and torches, shooting the junk items in all bottom droppers back up to the top droppers and unlocking all fuel hoppers simultaneously.
- Anti-Clog Safety Net: If you mix different fuel types (like oak and birch planks), a fuel item may get stuck inside a locked hopper while a different fuel sits in the furnace fuel slot. Every time the fuel minecart returns and rests on the
Detector Rail, the subtract-mode comparator and 4-tick repeater loop generate a timed pulse. This pulse travels down the torch tower to briefly toggle the torches on the blockedPistons, unlocking the fuel hoppers just long enough for waiting items to slip into the furnaces as soon as the fuel slot clears.
Tips & variations
- Fuel Restrictions: Because the detection slice relies on a comparator signal strength of 1, only use stackable fuels (coal, charcoal, planks, sticks, dried kelp blocks, blaze rods, or scaffolding). Do not use unstackable fuels like Lava Buckets or wooden tools, as they emit a signal strength of 3 and will bleed into neighboring slices.
- Furnace Count Recommendation: Build your array with a number of furnaces that divides evenly into 64 (such as 4, 8, 16, or 32) so full stacks smelt in even cycles.
- Expanding Beyond 14 Furnaces: Redstone signal strength runs out after 15 blocks. If you build more than 14 furnaces, leave a 1-block gap after every 14th furnace and place a
Redstone Repeaterin the gap along the bottom reset line, the safety-net piston line, and the top detection line to refresh the signal before continuing with the next 14-furnace module. - Bedrock Rail Placement Trick: In Minecraft Bedrock, parallel rails placed directly above or beside each other often snap together. Always lay the lower track one rail past the end block first, lay the upper track, and then break the extra lower rail and place your solid end block.