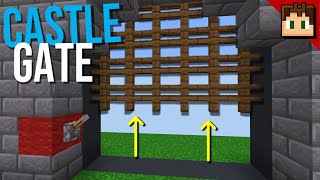
Video: Minecraft | Sliding 5x5 Piston Door (Redstone Tutorial) by Monocle
How to build it
- Clear a 20x5 Workspace
Choose your doorway location and clear a 20-block wide by 5-block deep area on the ground. Mark the 5-block wide doorway at one end, leaving 15 blocks of horizontal clearance beside it to house the retracted flying machines.
- Build the First Activation Tower
Count 3 blocks in from the back corner and 9 blocks across to place your first marker wool block. One block over from this marker, stack 5 regular pistons vertically, then build a zig-zag glass staircase up the back of the column and run redstone dust all the way to the top piston.
- Add the Fast-Pulse Trigger and Dual Piston Towers
Run a repeater into the base of the first tower with 3 redstone dust behind it leading to a sticky piston pushing an observer. Have that observer power two more vertical columns of 5 regular pistons on the opposite side, using a glass staircase and redstone dust to connect both columns from top to bottom.
- Place the Back Immovable Stoppers
Place a vertical column of 5 immovable blocks (such as obsidian or furnaces) right next to the glass staircase of your activation system. These stop the flying machines from crashing into your redstone wiring when the door opens.
- Assemble the Bottom Flying Machine Engine
Start the bottom layer with 2 slime blocks, an observer facing into a sticky piston, and 2 more slime blocks attached to that piston. Add an opposing sticky piston facing back toward the first section with 2 slime blocks and an observer, followed by one more observer-piston pusher module at the front to complete the two-way engine.
- Attach the Bottom Door Arm and Front Stopper
Extend a line of 5 slime blocks forward from the front of the bottom flying machine and attach your 5 bottom door blocks to the side face (inset by one block). Place an immovable block at the far end of the doorway so the machine stops cleanly when closed.
- Test the First Layer
Power the input block with a button to test the bottom slice on its own. Confirm that the entire row slides across to the front stopper and returns all the way back on a second press before building the upper rows.
- Stack the Remaining 4 Layers
Build the next 4 layers directly on top of the first using the exact same observer and sticky piston layout, but alternate strictly between honey blocks and slime blocks on each horizontal row. Test each layer right after you finish building it so any misplaced observer is easy to spot.
- Line the Frame with Non-Stick Blocks
Line the floor, ceiling, and inner frame walls wherever the moving honey or slime columns pass with immovable blocks or glazed terracotta. This prevents the flying machines from grabbing the surrounding hallway and stalling.
- Wire the Entry Buttons
Place a button on both sides of the doorframe and run a redstone dust line underneath using repeaters to maintain signal strength all the way back to the main input block.
How it works
This door works by stacking five independent horizontal flying machines on top of each other:
- Alternating Honey and Slime: Honey blocks and slime blocks do not stick to one another. By alternating rows of slime and honey vertically, all five flying machines can slide side-by-side without exceeding the 12-block piston push limit.
- Staggered Piston Activation: Each flying machine has two segments that must be triggered in the right order. When you press the button, a sticky piston pushes an observer to send an immediate 1-tick pulse to the dual piston columns, while a repeater slightly delays the pulse to the single piston column.
- Updating the Observers: The vertical columns of regular pistons extend briefly in front of the flying machines' rear observers. Updating the front module slightly before the rear module launches all five rows smoothly across the 5-block doorway until they hit the immovable stoppers.
- Inset Door Surface: Because the front pusher module moves one step ahead during the closing sequence, setting the visible door blocks one block back keeps the 5x5 face flush while moving.
Tips & variations
- Java Edition Only: This design relies on Java Edition flying machine timings and sticky piston behavior; it will not work on Minecraft Bedrock Edition.
- Test Layer by Layer: Never build all five layers before testing. If one observer faces the wrong way in the middle of the stack, the flying machines will tear each other apart and take a long time to rebuild.
- Budget Immovable Blocks: You do not need 30 obsidian in survival mode. Furnaces, droppers, or glazed terracotta (which doesn't stick to slime or honey) work great for the floor, ceiling, and frame stoppers.
- Directional Resource Pack: Using a pack that shows clear arrows on the backs and sides of observers makes aligning the 16 observers much easier.