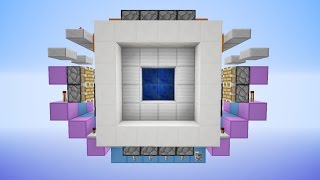
Video: EASY 3x3 Vault Door for Minecraft Bedrock 1.21! by InfinityMC
How to build it
- Clear Area and Build the Frame
Clear an area that is 8 blocks long, 3 blocks wide, and 8 blocks tall (including 2 blocks dug beneath the floor level). Build your 3x3 door frame so that it is 1 block away from the right edge and 2 blocks away from the left edge of your cleared space.
- Place the Bottom Pistons
Break the three floor blocks of the frame. Underneath, place four sticky pistons facing upward in a T-shape: a vertical stack of two pistons in the center for the double piston extender, flanked by one upward-facing piston on the left and right, then replace the three floor blocks.
- Place the Side Pistons
On the left side of the frame, use temporary blocks to place a vertical pair of sticky pistons facing inward on the front face, and another pair on the back face. Repeat this exact setup on the right side of the frame so you have four inward-facing pistons on each side.
- Place the Top Pistons
Move to the top of the door frame and use temporary blocks to place a row of three sticky pistons facing downward along the front face. Repeat this on the back face so you have six downward-facing pistons in total, then remove any temporary blocks.
- Wire the Bottom Double Extender
Place an upper slab against the bottom-most center piston with redstone dust on top. Add supporting solid blocks underneath the base to create a path around the bottom pistons, placing two repeaters each set to 3 ticks (two clicks) connected by redstone dust to time the bottom extension and retraction.
- Build the Redstone Torch Tower
From the bottom redstone line on the side, place a block with a redstone torch on it to begin carrying the signal upward. Place a solid block on top of that torch, another redstone torch above it, and one final solid block on top of the second torch.
- Wire the Side and Top Pistons
Run a line of redstone dust from the torch tower across the very top of the door frame and directly over the top sticky pistons. On the opposite side of the door, place a solid block between the two sets of side pistons and put a piece of redstone dust on top so both side pairs receive power.
- Add the Copper Bulb Toggle
Test the door with a temporary lever at the bottom input to ensure all pistons close into the 3x3 vault shape. Once tested, remove the lever and place a comparator feeding directly into that input dust, with a copper bulb right behind the comparator.
- Connect Double-Sided Buttons
Run a staircase of solid blocks and redstone dust from the copper bulb up to the walls on both the front and back of your door. Place a button on each side connected to this redstone line so pressing either button toggles the door open and shut.
How it works
This circuit works by synchronizing a bottom double piston extender with simple single-piston extensions along the sides and ceiling:
- Double-Sided Toggle: When you press either button, the pulse toggles the
copper-bulbon or off. Theredstone-comparatorreads the bulb's state and outputs a constant signal into the door circuit, functioning as a compact 2-block T flip-flop. - Bottom Center Mechanism: The bottom-center block has to travel two spaces up to reach the center of the 3x3 doorway. The bottom dust line powers the lower pistons immediately while two 3-tick
redstone-repeaterblocks delay the secondary pulse needed to push and pull the center block into the middle position. - Top and Side Activation: A vertical
redstone-torchtower inverts and carries the input signal up to the roof. The topredstone-dustline powers all six downward-facing pistons directly, while routing power down to the solid blocks positioned between the side pistons.
Tips & variations
- Vault vs. Flush Door: Because the outer ring of pistons sits on the front and back layers while the center piston is sandwiched in the middle, the closed door naturally forms a recessed 3D vault pattern. Use contrasting blocks for the center and outer ring to highlight the depth.
- Bedrock Exclusive Timing: This layout relies on Bedrock Edition's lack of quasi-connectivity and specific repeater delays (3 ticks) for the bottom double piston extender. It will not function properly in Java Edition without re-wiring.
- Button Placement: You can route the input dust line anywhere along your hallway walls—just make sure the signal strength reaches the copper bulb (add a repeater if your button is more than 15 blocks away).