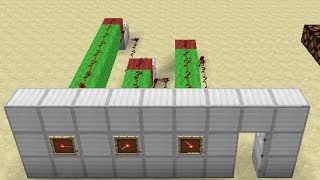
Video: Sequential Combo Lock in Minecraft (Redstone Tutorial) by SethBling
How to build it
- Build the First Decoder Cell
Start at the bottom layer by building a single logic cell: a block with a redstone torch on the side facing a redstone dust line, and another torch below feeding into that block to read from the layer above. This cell checks one position of one button's history.
- Clone the Cells into a 3x5 Grid
Repeat this cell structure every 2 blocks to create a row of 5 cells for your first button (giving a 5-digit combo). Then build two more identical 5-cell rows spaced 3 blocks apart sideways so you have three parallel lines—one for each of the 3 input buttons.
- Program Your 5-Digit Combination
Choose a 5-digit code using buttons 1, 2, and 3 (for example, 1-2-3-2-1), reading from the back of the machine (oldest press) to the front (newest press). At the matching button row for each step in your code, break the side redstone torch feeding the output line and replace it with a redstone repeater pointing into that line.
- Build the Shift Register Modules
Directly above each of the 15 decoder cells, construct a shift register cell: place a block over the lower reading torch, run a repeater into that block, and place a second repeater perpendicular to the first repeater to lock its side. Run a bridge of solid blocks with redstone dust over the top of the locking repeaters.
- Chain the Shift Registers Together
Make sure the data repeaters in each of the three button rows point in a continuous chain from the front (button side) toward the back, with solid blocks between each locked repeater and the next. When built across all 5 positions and all 3 rows, the upper redstone dust lines form three long lock-control rails.
- Connect and Refresh the Lock and Output Lines
At the back of the circuit, join the three lower decoder dust lines into a single master door line, placing a repeater at the end of each branch and another along the main line (every 15 blocks) to maintain signal strength. Similarly, connect the three upper lock-control lines together with repeaters feeding into the front of each row.
- Install the Three Input Buttons
At the front of each of the three shift register rows, build a cross-shaped arrangement of blocks around the entry point and break the center block. Place a repeater leading from each button mount directly into the first locked repeater of its row, and place your three input buttons on the user-facing front blocks.
- Wire the Shared Button Trigger Line
Run a line of redstone dust directly beneath all three button mounting blocks. Whenever any of the three buttons is pressed, it will simultaneously power its own row's entry repeater and send a signal down this shared bottom wire.
- Build the Brief Off-Pulse Generator
At the end of the shared bottom wire, place a block with a redstone torch on top and a block above the torch. Branch the wire into two parallel repeaters behind it—leave one repeater on 1-tick default delay and set the other to 4 ticks—then combine their outputs with redstone torches/dust into the upper lock-control line so that pressing any button briefly turns the lock line OFF.
- Wire the Iron Door and Inside Exit Button
Run the lower master output line to the front wall and into a block holding an inverting redstone torch beneath your iron door. Build a floor and wall around the buttons and door, and place an extra button on the inside next to the door so you can exit after the lock resets.
How it works
This circuit relies on a digital logic structure called a shift register built from locking repeaters:
- Repeater Locking: When a powered repeater points into the side of another repeater, the target repeater is locked in its current state (either ON or OFF) even if its input changes. All 15 data repeaters (3 buttons × 5 history slots) are normally kept locked by the powered redstone line running over the top of the machine.
- Shifting on Button Press: Pressing any of the three buttons sends power into the front of that specific button's repeater chain while also triggering the pulse generator via the lower shared wire. The pulse generator briefly turns the upper lock line OFF for a fraction of a second before turning it back on.
- Advancing the History: During that brief unlock window, every repeater in all three chains reads the state of the repeater behind it, shifting every stored press one position toward the back. The pressed button writes an ON state into the first slot of its own row, while the other two unpressed rows shift an OFF state into their first slots.
- Combo Decoding (NOR Gate): Beneath each shift register slot, the circuit compares the stored state against your programmed code. Slots that should be ON use a repeater (combined with the reading torch's inversion, an ON slot sends no power to the output line). Slots that should be OFF use an inverting redstone torch (an OFF slot also sends no power). If even one of the 15 slots does not match, the bottom output line stays powered, keeping the door's final torch off. When all 15 slots match the 5-digit sequence, all three bottom lines go completely dark, the door torch turns on, and the iron door opens.
Tips & variations
- Waiting Between Presses: Wait until the previous button pops back out before pressing the next button in your sequence. Pressing buttons too rapidly while the previous button is still active will merge the pulses and skip an entry.
- Changing the Combination: You can change the code at any time by swapping repeaters and redstone torches along the bottom decoder lines. Just remember that the back of the machine holds the first digit pressed and the front holds the last digit pressed.
- Expanding the Lock: To add more buttons (e.g., 4 or 5 buttons), clone the 5-cell column sideways with a 3-block gap. To make the code longer (e.g., 7 digits), clone the 2-block-long cells toward the back. If any redstone dust line exceeds 15 blocks, insert a repeater to refresh signal strength and adjust timings so the unlock pulse still arrives while the button is powered.
- Optional Visual Feedback: You can place sticky pistons on top of the locked repeater output blocks to pop up whenever a slot holds an ON signal, making it easy to see when a button press has been registered.