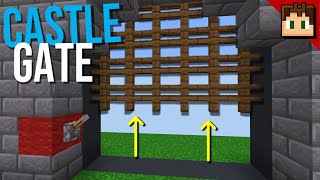
Video: Expandable Flying Machine Piston Door (No Exposed Redstone) | Minecraft Java Edition 1.15 - 1.16+ by TP_West
How to build it
- Prepare the Door Frame and Pit
Build a wall at least 4 blocks thick with a 7-wide by 9-high doorway opening. Directly underneath the doorway floor, dig a trench 15 blocks deep and wide enough to fit the flying machines and activation lines.
- Place the Bottom Stop Blocks
At the bottom of the pit, place a horizontal row of 7 obsidian blocks (or any immovable block) aligned with the doorway. This row stops the 7 flying machine slices when the door retracts.
- Build the First Flying Machine Engine
On the first obsidian block, place 2 slime blocks, an upward-facing observer (output pointing up) with an upward sticky piston on top, and a Tetris-shaped cluster of 4 slime blocks. Add a downward sticky piston, another observer, and another downward sticky piston to complete the two-way engine.
- Stack the Upper Pusher Extensions
Above the engine, build an L-shape of 3 honey blocks with an observer and upward sticky piston to push the upper door sections. Repeat this L-shape module above it using slime blocks, then cap the very top of the slice with a 2x2 square of 4 honey blocks.
- Tile All 7 Alternating Slices
Build 6 more identical vertical slices across the 7-block width, alternating every slime block section with honey blocks and vice versa so adjacent slices do not stick together.
- Build the Closing Observer Tower
Behind the center of the parked flying machines, build a vertical column of downward-facing observers reaching from the top down to the bottom piston level. Place an extra observer branching out at each of the 4 horizontal rows of sticky pistons.
- Add the Closing Powered Rail Lines
At each of the 4 piston levels, place a 7-block-wide row of solid blocks with powered rails on top. Place a 7-wide row of observers reading those powered rails and facing directly into the flying machine pistons and blocks.
- Build the Opening Trigger Line
On the opposite side near the top of the pit (3 blocks down from the floor), place a 7-wide row of solid blocks with powered rails on top. Underneath, place 7 observers facing into the solid door blocks right above the top sticky pistons.
- Connect the Button and Monostable Circuit
Wire buttons on both sides of the wall into a note block read by an observer. Split the redstone dust line so one side triggers the top opening rail line and the other triggers a sticky piston pushing an observer into a single powered rail to pulse the closing observer tower.
- Cover the Flying Machines with Door Blocks
Starting from the bottom L-shape and working upward, cover both outer faces and the top of the slime and honey blocks with solid building blocks. The blocks directly in front of the top opening observers must be solid opaque blocks so they can transmit power.
- Add Gravity Blocks and Immovable Frame
Place gravity-affected blocks (such as concrete powder, sand, or gravel) in the top outer corners of the door so they drop into place seamlessly. Finally, line the inner side frames and top ceiling trim of the doorway with immovable blocks like obsidian, smokers, or barrels so the flying machines do not grab the wall.
How it works
This door uses 7 independent vertical flying machine slices made of alternating slime and honey blocks so they can move side-by-side without sticking beyond the 12-block push limit.
- Closing (Moving Up): Pressing the button fires a sticky-piston monostable circuit that pulses a vertical spine of observers. That spine powers 4 horizontal rows of
powered-raillines simultaneously. Observers watching the rails pulse both the main engine and the stacked L-shaped extension modules at the same time, launching all segments upward until the top hits the immovable barrel ceiling. - Opening (Moving Down): Pressing the button again powers the upper
powered-railline. A row of 7 observers pulses the solid door blocks directly above the engines, updating the downward sticky pistons and sending the entire door back down into the pit until it rests on the bottom obsidian row. - Corner Filling: Because the top corners of the doorframe cannot be pulled down directly without exceeding push limits or exposing slime, gravity blocks (concrete powder) rest on top of the door face and automatically fall down when the door retracts.
Tips & variations
- Java Edition 1.15+ Only: This design relies on honey blocks not sticking to slime blocks and Java piston update behavior (quasi-connectivity/observer timings). It will not work on Bedrock Edition.
- Expanding Vertically: To make the door taller, stack additional alternating slime/honey L-shape extension modules on top of each slice and add another horizontal powered-rail observer row to the bottom activation tower for each new level.
- Expanding Horizontally: A single powered rail line only reaches 9 blocks from its power source (allowing up to a 17-wide door if powered from the center). For doors up to 27 blocks wide, replace the top activation rail line with redstone dust lines powered from two points.
- Check Solid Blocks: Do not use glass, slabs, or stairs on the row that receives the top observer pulse, as transparent blocks cannot conduct the redstone pulse to trigger the downward return engine.