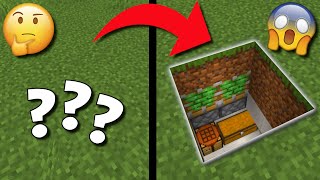
Video: Minecraft Bedrock: 2x2 FLUSH HIDDEN DOOR Tutorial! 1.21 by Tomco
How to build it
- Clear the Build Area and Mark the Door
Clear out a space that is 6 blocks wide, 3 blocks deep, and 6 blocks tall. Place your 4 door blocks in the front center where you want the flush 2x2 entrance to sit in your wall.
- Place the Bottom Sticky Pistons
Dig below the two bottom door blocks and place 2 sticky pistons facing straight up so they are directly underneath the bottom two blocks of the doorway.
- Place the Top Downward Pistons
Place two temporary blocks on top of your 2x2 door frame. Go to the back of those temporary blocks and place 2 sticky pistons facing downwards behind the top of the door, then break the temporary blocks.
- Add the Side Pusher Pistons
Behind the door frame, place temporary blocks so you can position 2 sticky pistons on the left side facing right (inward toward the center) and 2 sticky pistons on the right side facing left. These should sit directly behind the wall on either side of the top downward-facing pistons.
- Position the Front-Facing Pistons
In front of the inward-facing side pistons (one block behind the wall plane), place 1 sticky piston on the left and 1 on the right, both facing forward toward the wall. Remove any temporary helper blocks when finished.
- Set Up the Top Input Blocks
Place 2 solid opaque blocks (such as wool, stone, or cobblestone—not glass or slabs) directly on top of the two downward-facing sticky pistons. Place Redstone dust on top of both blocks; this is your main input line.
- Wire the Right Side
To the right of the top input blocks, place an upper slab or glass block with a Redstone repeater on top of the neighboring solid block set to a 3-tick delay. Place a solid block in front of the repeater, Redstone dust on top of the slab/block next to the pistons, and another solid block to power the right-side piston assembly.
- Wire the Left Side
On the left side of the top input blocks, place a solid block with a Redstone repeater set to a 3-tick delay running out from the center dust. Place a solid block after the repeater, then an upper slab (or glass) next to the left pistons with Redstone dust on top.
- Build the Transparent Tower Downward
From the left side, step the Redstone dust down toward the floor using glass blocks or upper slabs so the signal can travel down without being cut off by solid blocks.
- Connect the Bottom Pistons
Continue the Redstone dust line along the bottom blocks underneath the floor and run it directly into the 2 upward-facing sticky pistons at the base of the door.
- Attach the Lever and Camouflage
Connect a lever to the top two central Redstone dust pieces (or run a Redstone line out to a hidden lever on your outer wall). Fill in the surrounding wall with matching blocks so the 2x2 door sits completely flush when powered.
How it works
This Bedrock 2x2 flush door divides the opening and closing job between a vertical movement at the top and bottom and a horizontal double-axis movement on the sides:
- Closing the Door (Lever ON): When you power the two central Redstone dust pieces on top, the signal travels down the transparent glass/slab staircase to power the two bottom sticky pistons, pushing the lower two door blocks up into place. Simultaneously, the side repeaters (set to
3 ticks) delay the signal slightly before powering the front-facing pistons, while the direct dust pushes the inward-facing pistons first. This pushes the forward-facing pistons into the center, and then the delayed repeaters extend them forward so the top two blocks sit flush with the wall. - Opening the Door (Lever OFF): Flipping the lever off immediately depowers the front-facing pistons before the 3-tick repeaters turn off, allowing the top blocks to pull back one block from the wall first. Then the side pistons retract them out of the walkway, while the top downward-facing pistons and bottom upward-facing pistons retract the remaining blocks into the ceiling and floor.
Tips & variations
- Use Matching Wall Blocks: A flush door is only secret if the 4 door blocks match the surrounding wall texture (e.g., stone bricks or planks).
- Solid vs. Transparent Blocks: The blocks directly under the main top input and next to the repeaters must be solid blocks so they can conduct power into the adjacent pistons, while the downward wiring on the left requires glass or top slabs so the Redstone line is not blocked.
- Adding Buttons or Pressure Plates: Any external input—such as a T flip-flop connected to buttons or pressure plates—simply needs to feed its output signal into either of the two top-center Redstone dust pieces.
- Bedrock Edition Specific: This wiring is designed around Minecraft Bedrock piston timings and lack of quasi-connectivity; Java Edition traditionally uses a much simpler roof wiring layout.