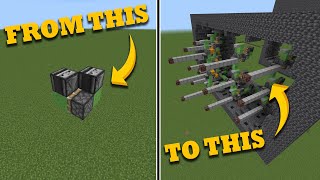
Video: A Comprehensive Guide to Redstone: Flying Machines! | Minecraft Java 1.21 by Jamesisnotaduck
How to build it
- Clear a Flight Path
Start a few blocks off the ground so the slime blocks do not grab the terrain below. Place an immovable block like obsidian at both ends of your desired track to act as stopping points.
- Place the First Piston and Slime Block
Place a sticky piston facing the direction you want the machine to travel. Attach one slime block directly in front of that sticky piston's head.
- Add the Opposite Piston and Slime Block
Beside the first slime block, place a second sticky piston facing back toward your starting direction. Attach a second slime block in front of this new piston so the two pistons and two slime blocks form an alternating 2x2 square.
- Attach the Observers
Place an observer against the outer side of each slime block so that its red output dot points directly into the slime block. Each observer will power the adjacent sticky piston right through the solid slime block.
- Launch the Flying Machine
Trigger the observer on the back half of the machine by placing and breaking a temporary block in front of its face (or flicking a lever/button on it). The contraption will immediately start flying forward until it hits the obsidian stop block; update the opposite observer to send it back.
How it works
This flying machine exploits two key Java Edition mechanics: observer movement detection and 1-tick sticky piston block spitting.
- Step 1 (The Push): When you update the rear observer, it emits a 1-tick redstone pulse into its attached
slime-block. Because slime blocks count as solid blocks in redstone terms, that pulse powers the adjacent rearsticky-piston, pushing the front half of the machine (the front slime block, front piston, and front observer) forward by one block. - Step 2 (The Pull): Moving an
observerwith a piston counts as a block-state change in front of its face. As soon as the front observer stops moving, it fires a 1-tick pulse through the front slime block into the front sticky piston. - Step 3 (The Cycle): Because sticky pistons drop or pull their block within a single tick on Java Edition, the front sticky piston reaches back and pulls the rear assembly (rear slime block, rear piston, and rear observer) forward to meet it. Moving the rear observer causes it to fire again, repeating the cycle infinitely until the machine hits an unmovable block like obsidian or exceeds the 12-block piston push limit.
Tips & variations
- Honey Block & Vertical Variant: While slime blocks are solid and transmit redstone power,
honey-blocks are transparent and cannot power a piston through themselves. To build a honey block flying machine—or a vertical flying machine going up and down—you must position the observers so their red output dots point directly into the sticky pistons rather than through the slime/honey blocks (typically requiring 4 slime or honey blocks in a line/L-shape instead of 2). - 2x2x2 Cube Variant: Need a machine that is only 2 blocks long instead of 3? Arrange two sticky pistons and two slime blocks in a flat 2x2 checkerboard facing into each other, then place the two observers on top of the slime blocks pointing toward the pistons. This uses quasi-connectivity to power the pistons diagonally below the observers.
- Adding Harvester / Sweeper Arms: You can attach wings of slime or honey blocks to the sides of the machine to sweep mobs off farms or break sugar cane, kelp, and bamboo. Always count your blocks: a piston can push a maximum of 12 blocks at once. Since each half of the core machine already pushes 2 blocks (the opposite piston and observer), your attached slime/honey wings plus core slime block cannot exceed 10 blocks per side.
- One-Way Economy Option: If the machine only ever needs to travel in one direction, the rear pushing piston can be a regular
pistoninstead of a sticky piston. - Java vs. Bedrock Note: This design relies on Java Edition's 1-tick sticky piston block-dropping behavior and will break or oscillate in place on Bedrock Edition.