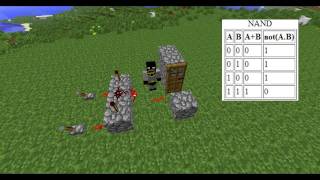
Video: Redstone Computer Tutorial - Episode 2 - The Mighty NAND Gate by Redstone Without Limits
How to build it
- Build the First NAND Gate
Place a row of 3 solid blocks with a Redstone Torch on top of the two outer blocks, and a patch of Redstone Dust on top of the center block. Unlike a standard AND gate, leave the output line un-inverted so that the gate outputs a signal by default until both inputs are turned on.
- Attach the Input Levers
Place two levers on your input lines (labeled Input A and Input B) leading into the two outer torch blocks of your first NAND gate.
- Add Two Intermediate NAND Gates
Build two more NAND gates slightly ahead and to the left and right of your first gate. Split the output dust line from the center of your first NAND gate and route it into one input of each of these two new NAND gates.
- Branch the Main Inputs
Run a secondary redstone line from Input A directly into the remaining free input of the left intermediate NAND gate. Do the same for Input B, routing a branch into the free input of the right intermediate NAND gate.
- Connect the Fourth NAND Gate (XOR Output)
Build a fourth NAND gate ahead of the middle two. Route the outputs from both intermediate NAND gates into the two inputs of this fourth gate to complete a 4-NAND XOR circuit.
- Place the First Bit Indicator
Attach a Piston with a wool block on top (or a Redstone Lamp) to the output of the fourth NAND gate. This acts as your 1s place bit (Sum) and will only activate when exactly one of the two input levers is switched on.
- Wire the Carry-Out Bit
To turn the XOR gate into a binary half-adder, tap into the output of the very first NAND gate before the intermediate gates. Route this line over to the side using a block bridge to cross over existing wires without connecting them, and invert or connect it to a second indicator representing the 2s place (Carry Out).
How it works
This circuit demonstrates universal NAND logic and binary place values (1, 2, 4, 8):
- Single NAND Gate: A NAND (Not-AND) gate consists of two inverted inputs merged with redstone dust. As long as at least one input is
OFF, its corresponding torch stays lit and powers the output line. Only when both inputs areONdo both torches turn off, cutting power to the output. - 4-NAND XOR Gate: By chaining four NAND gates together, you create an Exclusive OR gate. When one lever is flipped
ON, the first NAND gate stays active, allowing the opposite intermediate gate to toggle and turn the final fourth NAND gate's outputON. - Binary Addition & Carry Out: In base-2 (binary), each line represents a single bit that can only hold a
0or a1. Flipping one lever outputs a1in the 1s place. Flipping both levers (1 + 1) exceeds the capacity of the first bit; the XOR gate turns the 1s place back to0, while the line tapped from the first NAND gate shifts a signal over to the 2s place (Carry Out), representing the number 2 in binary (10).
Tips & variations
- Crossing Wires: When routing the Carry Out line from the first NAND gate over to the second bit, use solid blocks to step the redstone dust up and over perpendicular lines so the signals do not merge.
- Signal Strength: Because a 4-NAND XOR gate routes signals through multiple stages, keep an eye on the 15-block redstone dust power limit and add a Redstone Repeater if your lines get too long.
- Compact Alternatives: Building an XOR gate out of four individual NAND gates is great for learning computer architecture, though in survival builds you can also make smaller XOR gates using comparators or piston logic.